Wednesday, July 8, 2009

Stuffed Mushrooms

~School's out for the sumer! and now that it is, I can get back to cooking! :)

Yesterday my mom and I decided we wanted some of these good stuffed mushrooms. We first had them at a Christmas party at my brother and sister-in-law's house. They're REALLY RICH so if you're going to make them, mind you have people to share with (even though you aren't going to want to share).

Stuffed Mushrooms

INGREDIENTS:
  • 3 sweet Italian sausages, casings removed
  • 1 1/2 tsp dried oregano
  • 1 c freshly grated Parmesan cheese
  • 1/2 tsp Worcestershire sauce
  • 1/2 tsp garlic powder
  • 1 8-oz package of cream cheese, warmed to room temperature
  • 1 large egg yolk
  • olive oil (optional)
  • 24 large mushrooms, stems removed
  • Dry white cooking wine
*The olive oil is for pouring into the pan prior to cooking the mushrooms so they don't stick; we just pour on a little bit of the wine.

PREPARATION:

Saute sausage and oregano in large skillet over medium-high heat until sausage is cooked through and brown, breaking it into small pieces with the back of a fork.

Drain sausage and put in a large bowl to cool.

Once the sausage is cool, add in the Parmesan cheese, Worcestershire sauce, garlic powder, cream cheese and egg yolk. Mix well. (This is why the cream cheese needs to be well-softened before you start!!!)

Line a cookie sheet with aluminum foil. Pour small amount of wine or olive oil onto the foil and coat the foil to keep the mushrooms from sticking. Then line the mushrooms up on the cookie sheet with the hole side up. Using a basting brush, brush a little bit of wine into each cap, then fill the cap with the filling.

Heat oven to 350. Bake mushrooms uncovered until they are tender and the filling is brown on top. This takes around 20-25 minutes.

Ingredients:

All lined up on the pan and ready to go in the oven. See how overfull they are? You want lots of the yummy stuff on those mushrooms... :)


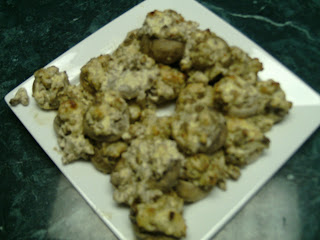
Ready to eat!!!

Thursday, April 16, 2009

Chicken Broth & Stock

I want to stress at the outset that it is not hard to make chicken broth or chicken stock. All it requires is a stretch of time in which you will actually be doing very little real cooking.

I'm putting this little how-to in here right now because I have a pot of broth making on the stove right now, with the intention of making a Moravian chicken pie later. We ate one in Old Salem, NC, last fall, and it was delicious, and I've been meaning to try it, so I figured now was a good time. In order to make Moravian chicken pie, though, you have to have chicken broth and I didn't have any... but I did have a chicken. As good a place to start as any, right?

If you want to buy chicken broth from the store, you can; the chicken pie would probably be just as good. By the same token, if you want to buy pre-made pastry crusts for the cobbler or the empanadas, you can do that, too. Just because I take the hard road doesn't mean you have to.

That being said, here's how to make chicken broth.

Start with a chicken - a whole one. Check the packaging to see if the giblets are included. If they are, they'll be in a plastic bag that you can just pull out of the chicken's body cavity. (Yes, you're pulling a bag out of the chicken's butt. Yes, it's gross.) Rinse the chicken thoroughly (inside AND out) and check for any stray feathers. Folks, I know people who work at Tyson. Check for feathers.

You're going to need a big, deep pot for this one. Put your chicken in the pot and cover it with water. Ad any cut vegetables you want to add - carrots, celery, bit of onion, what have you. Also add salt - probably a good bit of salt. I didn't measure; I just poured. Use your best judgment. Once you have everything in there, put it on the stove and get it up to a good, solid boil, then cut the heat back down to low and cover it. Now let it simmer for about three hours.

During the first few minutes, you can use a large spoon to skim the gunk off the top of the boil. This is just congealed protein and bits of skin; you won't need it.

After you're done cooking, run the broth through a fine strainer or collander into a bowl. Save the chicken - debone it carefully and put it aside, especially if you're going to make chicken pie with me - discard the vegetables and strained-out stuff, and put the broth in the fridge or to the side if you're cooking with me later.

For chicken stock, use 12 to 15 pounds of chicken bones rather than the whole chicken, and increase the cooking time to six hours.

I'll be back later tonight (or possibly tomorrow) with the recipe for the chicken pie.

Saturday, April 11, 2009

Skillet Enchiladas

So I got this recipe out of the Taste of Home cookbook, and tweaked it a little to my personal preferences. These are really good, and fairly easy to make, too. (Especially compared to the empanadas, LOL.) Also, on the plus side, there's no oven required for this recipe.

Skillet Enchiladas

INGREDIENTS:
  • 1 lb. ground meat (beef or turkey)
  • 1 medium onion (finely chopped)
  • 1 can condensed cream of mushroom soup
  • 1 can enchilada sauce
  • 1/3 cup milk
  • Canola oil
  • 8 corn tortillas
  • 2 1/2 cups shredded cheddar or mexican-style cheese
OPTIONAL INGREDIENTS:
  • 1/2 cup chopped olives
  • 1 to 2 tbsp. finely chopped green chili peppers
  • jalapenos (if you like it spicy)
PREPARATION:

You're going to need two skillets for this, a large one and a small one. Start with the large one; cook the meat and onion together over medium heat until the meat is nicely browned. Drain off the grease. Stir in the soup, enchilada sauce, milk, and the peppers if you want peppers. Cover and simmer on low heat for about 20 minutes, occasionally stirring to make sure it doesn't cook to the bottom of the pan.

At about the ten-minute mark, put just enough canola oil in the little skillet to cover a tortilla shell, and get it good and hot. Cook each tortilla one at a time for about three seconds, or just until it goes limp. BE CAREFUL because if you cook it too long, it'll go tough. Also be careful taking them out of the oil; use a spatula or something flat like that, because tongs will just tear up a soft tortilla and you need them whole. As you take them out of the oil, set them out flat on a paper towel to drain.

When the meat mix is finished cooking, scoop out a little less than half of it into a bowl. Then put about a quarter cup of cheese (or so) on each tortilla, along with olives if you want them or peppers or whatever. Then roll them up like burritos and lay them in the skillet on top of the meat mix. Once they're all in there, pour the rest of the meat mix back in on top of them, cover, and cook for just a few minutes. Now take the rest of your cheese and sprinkle all over the top of everything, cover again and cook for a couple more minutes just to get the cheese melted. Yummy!

Ingredients


Mixing the soup, sauce and milk into the browned meat/onions.


Laying the cheese-filled tortillas into the meat mix


Sprinkling the cheese over the cooked tortillas-and-meat


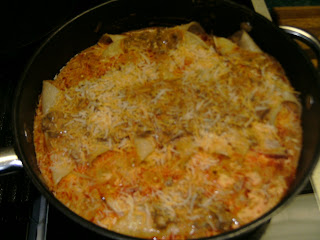
The finished product! It looks a little messy, but it's really good.

Saturday, March 28, 2009

Sour Cream Empanadas

It's unprecedented - two posts in one day from me! But our internet/cable went out earlier due to the storming here in middle Tennessee, so I had nothing to do but cook.

Before we begin, don't start this recipe unless you have a lot of time and maybe a masseuse; by the time I was done with this, my back was killing me from standing over the counter. BUT it was worth it - these things are really good. These would make really good finger foods at the next potluck you get stuck going to, or at a Christmas party or something.

Sour Cream Empanadas

PASTRY INGREDIENTS:
  • 2 cups flour (sifted)
  • 1 tbsp sugar
  • 1 tsp salt
  • 1/2 cup Crisco
  • 1 cup (8 oz) sour cream
  • 1 egg yolk
FILLING INGREDIENTS:
  • 3/4 lb ground meat (beef or turkey, thawed)
  • 1 large onion, chopped finely
  • 1/2 cup sour cream
  • 1/2 tsp salt
  • 1/2 tsp dried oregano
  • 1/4 tsp pepper
  • 1 egg
  • 2 tsp water

You're going to make your pastry first. Now, if you were with me for the fruit cobbler, you already have a pastry blender, a rolling pin and a flour sifter. If you weren't, well, you're going to need one of each.

Sift the flour into a large mixing bowl, and add the sugar and the 1 tsp of salt. Use the pastry blender to "cut" the Crisco into this mixture, just until it's kind of crumbly. Now, this won't get as crumbly as the pastry we made for the cobbler, so don't freak. Once the Crisco's all blended in, stir in the cup of sour cream and the egg yolk. Stir this all up and form the pastry into a ball (you'll want to make sure all the pastry is mixed up while you're doing this; I did the last of my mixing with my hands). Put the pastry back in the bowl, cover it with Saran wrap or something like that, and stick it in the fridge for at least two hours.

Once you're ready to begin, put your ground meat and onions in a skillet and brown them together. Then drain off the grease and stir in the 1/2 cup of sour cream, the 1/2 tsp of salt and the oregano. Set this to the side. At this point, preheat your oven to 450.

On a floured surface (just like we did for the cobbler) you want to roll out your pastry to about 1/8 inch thick. You don't want it too thin, but you don't want it too thick either. Cut out 3 inch circles from your pastry, scrunch the leftovers together, roll them out, rinse, lather, repeat until you run out of pastry.

Now, here's where things can get sticky if you aren't careful. You only want to do these a few at a time; I learned with my first batch. You're going to take a spoonful of meat and put on a pastry circle, then fold the pastry over to make a little clamshell. Squish the edges together, and use a floured fork to squinch down the edges a little more. Make a note - if you put meat on too many pastries at once, the pastry will get wet and stick to the counter. You don't want that.

Put the folded empanadas on a greased cookie sheet. Take the last egg and the 2 tsp water and beat them together in a bowl, and then, using a basting brush, brush the tops of the pastries with this mixture. Pop them in the oven and bake them for about 12 minutes. These are very good, and also very filling.

Everything laid out to get started


Mixed up nicely with the pastry blender. Not very crumbly, but crumbly enough.


Adding sour cream, egg, etc.


Ball of pastry, ready to go into the fridge.

Laid out on the pastry circles; some of them folded up.


Ready to go in the oven


Finished product!

Fritos And Eggs

Don't make that face, it's good. It's just not good for you.

My mom made this for us when we were kids, because neither my brother nor I would eat plain scrambled eggs (shudder). So she made these instead, which are nommy. Also very simple.

Fritos and Eggs

INGREDIENTS:
  • Fritos
  • Eggs
  • Bacon grease or butter
Not too complicated, see?

Begin by heating up your bacon grease in a skillet. Once it's hot, crunch up your Fritos into the bacon grease. For two eggs, you want to use maybe a couple handfuls of the regular Fritos. Brown the Fritos for a minute or so, then crack your eggs into them and scramble them up with a spatula. Serve. Yum.

Just in case you thought I was kidding

Chips browning in the bacon grease


Put the eggs in with the chips and scramble

May not look like much but you put it in your mouth, you'll see.


And here it is on the plate. Well, two plates - Mom wanted some, too!

Tuesday, March 24, 2009

How we cook steak at our house

Everybody has their own way of cooking steak, and this one is ours. You may not like it; my brother did this for some friends and they complained that the seasoning "masked the flavor of the meat". Well, whatever, this makes good steaks.

Ordinarily we cook nicely-marbled ribeyes. They're a bit more expensive, but it's worth it to have a quality piece of meat. However when I was digging through the freezer I ran across a package of these bacon-wrapped filet things (you know the ones) and I figured I might as well get them out of the freezer.

This is one of the few times I will actually recommend name-brand products.

You will need:
  • Garlic salt
  • meat tenderizer
  • Lawry's Seasoned Salt
  • A-1
  • Heinz 57
Start out by thawing your steaks. Do not thaw them in the microwave; they'll get tough. Stick them in a bowl in the fridge and leave them overnight or so.

In the morning, take the steaks out and put them on a cookie sheet or other similar platter (in the pictures I've used a pizza pan). Apply the garlic salt, meat tenderizer and Seasoned Salt. Not too heavy, or the steaks will get salty. Next, pour on some Heinz 57 and then some A-1. Smear these all over the meat with a spoon.

Now flip them over and do the same thing to the other side. Now cover them with aluminum foil and leave them til the early evening. This gives the sauces and such time to kind of soak into the meat.

Fire up your grill and get it nice and hot, then reduce it to about a medium heat. Toss the steaks on and let them cook with the grill shut. For a good, thick ribeye (usually 3/4 to 1 inch thick) you want to give them eight minutes or so on a side, but not all at once. Go about three and a half to four minutes, then flip them, then another 3-4 minutes, then flip, and so forth. If you like your meat rarer, obviously take them off the grill sooner. If you go about eight minutes on medium flame, you should get a nice medium-well slightly-pink business going.

Now, obviously on cooking times your mileage may wildly vary depending on your grill, your flame, etc. etc. So you want to keep a knife and grilling fork on hand. When you think they might be ready, cut them open and look. If they're still too pink for you, let them cook longer. If you're worried about overcooking the outside, turn the flame down. Grilling itself is something of a trial-and-error procedure, but the sauce will never steer you wrong.

Just the steak. Didn't think about taking photos until after I'd done one side, hence the sauce all in the pan.


Here with the garlic salt/tenderizer/seasoned salt on.


Here with the A-1 and Heinz 57.


On the grill! Don't those look good?


And on the plate. Despite the flash, you can see that we had ours this evening with a baked potato and some Really Thin Garlic Toast (recipe previously posted).

Sunday, March 22, 2009

Sandy Grimes's Blueberry Coffee Cake

My second cousin Sandy gave me this recipe. Actually, she fed it to me first, in her basement in north Georgia. Then she gave me the recipe when I begged. This is good stuff. I could honestly sit and eat this whole thing. She calls it a coffee cake, but we eat it for breakfast or dessert or whenever. You'll love it. Today we're having it for breakfast.

Before you get started, you're going to need a 9 inch cake pan. Sandy uses a springform pan because it's easier to get it out. You can get springform pans at Wal-Mart (that's where I got mine yesterday, LOL.) We have successfully made this in a regular pan, but our regular pan was only 8" so it never came out exactly like it should have. You also want to try and get the little miniature blueberries, like the kind you get in a blueberry muffin mix; they're better for this recipe than the big blueberries. I suggest the Dole brand.

Sandy Grimes's Blueberry Coffee Cake

INGREDIENTS:
  • 1 8-ounce package of cream cheese (softened)
  • 1 stick of butter (softened)
  • 1 cup sugar
  • 1 cup flour (sifted)
  • 1 egg
  • 1 tsp baking powder (not baking soda!)
  • 1/4 tsp salt
  • 1 tsp vanilla
  • 2 cups frozen blueberries (do not thaw!)
TOPPING INGREDIENTS
  • 1/4 tsp cinnamon
  • 4 tbsp sugar
PREPARATION:

Preheat your oven to 350.

Beat cream cheese and butter together until fluffy. We have a big KitchenAid mixer that we use for this; you can also use a hand mixer. I don't suggest trying this with a spoon.

Once the cream cheese and butter are nicely mixed, gradually add the sugar, then add the egg. Now add the flour along with the salt and baking powder (you can actually measure the salt and baking powder off into the flour, if you like, when you're getting set up). Last, add the vanilla.

Now set your mixer aside and get a spatula. Gently fold the blueberries into the mix. The batter will be thick, but if you're not careful, you'll smush up your blueberries and then there you'll be, smushed blueberries. The blueberries may not all mix in; don't worry about it. You can cover them up with mix once you put it in the pan.

Now spray your 9 inch pan with cooking spray and dump the mix in. It's going to be very thick, and you'll have to use your spatula to spread it out in the pan. Mix your topping cinnamon-and-sugar and sprinkle it all over the top of the cake. Pop it in the oven for 50 minutes or until a toothpick inserted into the middle of the cake (between the berries) comes out clean.

Getting set up; everything except the topping mix.


The mix, before blueberries


In the springform pan, with blueberries. As you can see, I smushed a couple of the blueberries while I was mixing; that's why the mix is so purple. Heh. Oops.

Saturday, March 21, 2009

Mandy Campbell's Cobbler

I've never made a cobbler before. That staple of Southern dessert, so near and dear to my heart, has always been my mother's job. Then today I got bored. Like really, seriously, terminally bored. So I thought, oh, what the heck.

So you're properly prepared for the gravity of the undertaking here, this is my grandmother Ferguson's recipe. She had it from her mother (my great-grandmother Campbell), who baked her peach cobbler in a washtub. So this recipe is no joke at least 110 years old.

Now, we ordinarily make this cobbler with peaches, but we didn't have any peaches in the house. We did have raspberries though, which my mother bought on accident when going for strawberries because she's lazy and doesn't read labels. So I thought, okay, raspberry cobbler. So here we go.

This is a recipe in two parts. First you have to make a pastry, then you use the pastry to make the actual cobbler. So let's begin.

Mandy Campbell's Cobbler

INGREDIENTS:
  • at least 24 oz of fruit (your choice, needs to be thawed if it's bought frozen)
  • Sugar
  • Flour
  • 2/3 cup Crisco shortening or butter for a richer flavor (if you use butter, make sure it's softened before you start!)
  • Boiling water
  • 3/4 tsp. salt
  • 1 stick of butter (not the same as the above 2/3 cup!)
Note: I deliberately didn't include amounts on flour and sugar. Suffice it to say you better not get started if you don't have a good bit of both. You're also going to want a flour sifter, a rolling pin and a tool called a pastry blender. If you don't have one, you can use knives, but I really suggest the pastry blender.

PREPARATION:

Before beginning, place your fruit in a large bowl. It won't have a lot of juice, especially if it came frozen, so you're going to gently fold in about half a cup or so of sugar using a soft (rubber or silicone) spatula. Set this to the side and let it sit while you're making your pastry.

Also, preheat your oven to 400.

Now roll up your sleeves, and I hope you have a decent amount of counter space. (If not, a good clean tabletop will do, but you'll want to cover it with wax paper before starting; dampen the surface so the wax paper will stick.)

Sift 2 cups of flour into a large mixing bowl. Add the salt, then drop the Crisco or butter on top of this. Use your pastry blender to slowly "cut" the Crisco into the flour-and-salt mix. You want to mix this until it's nice and grainy, kind of crumbly-like. Then you want to start adding the boiling water, about 1/4 to 1/2 of a cup at a time, and mix this up with a fork until it sticks together good. (Mom says "until well blended.") You want to be careful not to get this too wet!!!

Now, using your flour sifter, shake out some flour onto your work surface. (See why I said you wanted wax paper?) Dump the pastry into the middle of the flour. Flour your rolling pin so it doesn't stick to the pastry, flour the top of the pastry so it doesn't stick to the rolling pin, and gently roll the pastry out until it's really thin, maybe like 1/4 inch (6.5 mm for you metric types).

Now you need a regular table knife, preferably without a serrated edge. Stick the blade into the flour (so it doesn't stick!) and start cutting your pastry into one-inch-thick strips. Cover the bottom of a greased 9 inch square baking pan with pastry strips (since it's the bottom, and nobody will see it, use the jaggedy edges).

Now add a layer of your juicy fruit, a layer of pastry, and keep layering like so until you've used all the raspberries and all the pastry, ending with pastry on the top.

Cut small pats of butter and layer all over the top (you probably won't use the whole stick), then sprinkle liberally with sugar. Bake for about 20 minutes or until the top crust is a nice golden-brown.

We like this with vanilla ice cream, especially if you use a tarter fruit like raspberries or blackberries.

The fruit, in the bowl, with the sugar already stirred in. See how it's getting juicy?

Crumbly flour-salt-Crisco mix

Pastry, after the water, with the flour on, ready to roll out

All rolled out, sliced into about 1 inch slices

Pastry in the pan, with butter pats and sugar, ready to go in the oven


The finished product! (Actually took a little longer than 20 minutes; hence the "until golden brown" part.)

Tuesday, March 17, 2009

Mom's Island Meat Balls

This one's another favorite at our house, 1) because it tastes really good and 2) because it works really well for leftovers. Mom serves this over rice, but I'm not a huge fan of rice so often I just eat the meatballs by themselves or with whatever side dish.

Mom's closing tonight (she works in a big home improvement box store) so I wasn't planning on cooking anything, but I got bored so I dug out this recipe because it's easy and (on the plus) doesn't require an oven. However, because I hadn't planned on cooking, the ground beef was frozen solid when I got started. Most new microwaves have a defrost setting for meat; if yours doesn't, try this tutorial at wiseGEEK to thaw the meat in the microwave. This should be a last resort; I always suggest that you plan ahead and thaw your meat overnight in the fridge... but if you're like me (lazy!) then the microwave can work well.

Mom's Island Meat Balls

NOTE: This recipe is just about enough for one person. We usually at least double it.

INGREDIENTS:
  • 1/2 cup chopped onion
  • 1/2 cup ketchup
  • 1 cup plain water
  • 8 tbsp sugar
  • 6 tbsp vinegar (I really recommend regular vinegar for this, not the apple-cider variety, but whatever pops your crank)
  • 2 tsp Worcestershire sauce
Combine all the above ingredients in a bowl and set them aside.
  • 1 lb. ground meat (beef or turkey)
  • 1 tsp salt
  • 1 egg (beaten)
  • 1/2 cup saltine cracker crumbs
  • 1/2 tsp pepper (plain table pepper, not that white pepper)
  • 1/4 cup milk
PREPARATION:

Combine the second set of ingredients in a large bowl. Mash them up really good with your hands. Form into small balls (about the size of one of those high-bounce balls we used to get out of the quarter machines when we were kids) and brown in canola or vegetable oil. (You can use olive oil, but it's more expensive and Mom doesn't like it; she says it makes the meat taste funny. I can't tell the difference, personally. Also, don't use a lot of oil; you're browning, not deep-frying.)

Once the meatballs are browned, drain off all the oil, then add the sauce and cook over low heat for about 45 minutes or until the sauce gets nice and thick. They taste very sweet, almost like pineapple or something. It's yummy.

Making the sauce


Meatballs cooking in the oil


Cooking in the sauce
A little bit of the finished product! My sauce didn't thicken up quite right, not sure why... Moooooooooooom!!!!!!!


Edit: Mom says the reason my sauce didn't thicken is because I cooked it with a lid on. *facepalm*

Friday, March 13, 2009

Really Thin Garlic Toast

Hi, guys! Haven't cooked anything in a couple of days (we've been eating leftovers! LOL) but we decided today to have soup and garlic toast. I'm not touching the soup yet, but I promised to share the garlic toast recipe the other day, so here it is.

If you like garlic toast or those garlic bagel chips, this is a really yummy alternative. (Also, much cheaper, considering that those garlic bagel chips can cost up to $3 or $4 per little tiny bag.)

For this recipe, you're going to need a basting brush, the type you'd use to brush barbecue sauce on chicken. You'll also need a saucepan (obvs.) and a cookie sheet covered in a layer of aluminum foil (for easier cleanup). The other thing you'll need is a garlic press.

Really Thin Garlic Toast

INGREDIENTS:
  • French loaf (can be a full size loaf or those smaller sub-sandwich type rolls)
  • 1 stick of butter or margarine
  • Several cloves of garlic
  • Dried parsley flakes in a bowl
PREPARATION:

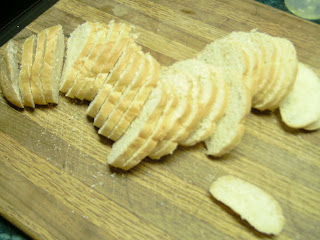
Preheat your oven to 400 and put the rack up to the center. Melt butter in saucepan. While the butter is melting, slice your French loaf really thin (see the picture below for an example of just how thin to slice it). Once the butter is melted, use the garlic press to squish your garlic into the butter, and let it sit for a bit to get the garlic flavor out into the butter.

Line your French loaf slices out on the cookie sheet. Use the basting brush to brush the garlic butter on the bread. Now take a pinch of the dried parsley flakes and grind them up between your fingers, sprinkling them all over the buttery bread.

Flip the bread over and repeat this process on the back side. Now pop it into the oven. Bake for about 5 minutes, then take it out and look at it. If it's toasted nicely on both sides, it's done; if not, flip the slices over and pop it back in for a few minutes (2 or 3). Check it again. If it's toasted, it's done.

This is REALLY good with soup, especially homemade vegetable beef stew, or just by itself as a munchy snack. NOTE: You can also make croutons using this recipe. To do that, use regular sliced white bread and cut it into good-sized cubes, rather than thin-slicing French bread. You can also thin-slice bagels to make actual bagel chips... this recipe is very flexible. :)

The sliced bread

The melted garlic butter

The bread, with parsley, ready to go in the oven

After toasting (and some sampling)

Saturday, March 7, 2009

Spanish Rice

My mom makes this all the time. It's a little more complicated than what I like to do, but on a Saturday when you haven't really got much else to do, it's not bad to spend a little time doing it. Also, it's pretty yummy, and it makes a lot, so there's leftovers for Monday's lunch. For more than one person.

Spanish Rice

INGREDIENTS:
  • 1 pound ground meat (beef or turkey)
  • 2 cans of whole peeled tomatoes
  • 1 onion, finely chopped
  • coarsely chopped garlic cloves (amount depends on how much you like garlic)
  • 1 1/2 - 2 cups rice
  • water
  • salt
  • a frying pan with a lid
PREPARATION:

If your ground meat is frozen, it needs to be thawed mostly all the way before you get started. If you know you're going to make this, take your meat out of the freezer the night before and just stick it in the fridge (in a bowl so it doesn't melt all over).

Brown your ground meat in a big frying pan on medium heat (5-6 for electric stoves, medium flame for gas). While you are doing that, chop up your onion (use a chopper if you have one) pretty fine - you don't want big chunks. Also chop up your garlic cloves (make sure you peel them first!) fairly coarsely; you can have little chunks of that, because they'll cook up soft and you won't notice them much.

Once the ground meat is browned, put a strainer or collander in the sink and dump the meat into it to drain off all the grease. Then put the meat back into the skillet and put it back on the stove. Add your garlic and onion, and add your rice. Then open up your cans of tomatoes - this is where things get sticky.

Pour the tomato juice into the mess in the skillet, but catch the tomatoes and squish them up really hard in your hands. (Tip: Poke a hole in each one with your finger before squishing; it helps reduce the incidence of having juice squirt all over the stove/counter/you.) Then dump the squished remains of tomato into the skillet also. When you've done this for all the tomatoes, you want to fill each can with water (plain old tap water) and pour the water into the skillet as well. Sprinkle some salt in (to taste) and mix it up well.

Cover the skillet and cook it. You want to check it about every 20 minutes or so to make sure it hasn't run out of water (you need the water to cook the rice). You know it's done when your water is mostly gone out of it but the rice is cooked nice and tender. It's something you kind of have to eyeball.

Serves 8 easily.

My dad used to love to eat this stuffed inside a Bell pepper. Just core the pepper and boil it for about 3 minutes. Then fill it with this rice mix, and bake it in the oven on a cookie sheet at 350 for about half an hour or so, until the pepper is tender. Mom and I don't like peppers, though, so we just eat the junk plain out of a bowl.

You can serve a green salad with this, and some hot bread. In fact, I have a really scrumptious recipe for garlic toast that I think I may have to share tomorrow. Today, though, we're having it with buttered saltine crackers. Yum!

Getting set up (we keep our rice in the Karmelcorn bucket because it's airtight and fits well in the freezer)
Everything in but the tomatoes
Cooking!

What it looks like when it's finished

Friday, March 6, 2009

Scalloped Tuna


I made this tuna tonight, and it's good. I found the base recipe on about.com and modified it because it was ridiculous. There was twice as much sauce as food and almost three times as much pan.

This does involve making a sauce, and I'll go ahead and tell you that before today, I never made a sauce or a gravy before in my life. Never. So I had no idea how it would turn out. Well, it was really easy to do and as long as you remember to keep it on a low heat (Lo-2 for electric stoves, low flame for gas) you'll do fine. Also, make sure you stir constantly. Now, this doesn't mean you have to stand there stirring until your arm falls off; you can walk away and wash a dish or muzzle the kids and come back to it. But don't leave it very long or it'll cook to the bottom of the pan.

Scalloped Tuna

INGREDIENTS:

  • 4 tablespoons butter
  • 4 tablespoons flour
  • 1 teaspoon salt
  • 1/4 teaspoon pepper
  • 2 cups milk
  • 2 tablespoons finely chopped onion
  • 1 tablespoon dried parsley flakes
  • A bag of Ruffles (or similar) potato chips, crushed coarsely. (You won't need the whole bag, but most of it.)
  • 2 six-oz cans tuna, flaked and drained (maybe 3, depending how much you like tuna)
  • 1 small can mushroom stems & pieces, drained and chopped coarsely
  • OPTIONAL some grated Cheddar cheese to go over the top. (not a lot.)

PREPARATION:

Melt butter in saucepan over low heat; blend in the flour, salt and pepper. Gradually stir in milk. Continue cooking, stirring constantly, until smooth and thickened. Add onion and parsley. Arrange 1 cup of the chips in the bottom of a greased 8-inch square baking dish. Cover with layers of the tuna, mushrooms, white sauce, and another 1 cup potato chips. Repeat, ending with the last cup of potato chips, and the cheese if you want it. Bake at 350° for 30 to 35 minutes.

Serves 6-8. (6 at most if you're only eating casserole; up to 8 if you're serving a vegetable with it.)

We ate this with a side of canned English peas and a boxed Scallop potatoes mix. It was a little too much Scallop all together, I think... next time I'd probably use the cheesy au gratin potato mix. Mom pronounced it a success, and raved over how good it was. This may, in retrospect, have simply been out of surprise that I actually cooked. We'll see how much she likes whatever I try tomorrow.

Getting set up

The white sauce
The finished product, ready to go into the oven

Confessions of a Lousy Cook

That's pretty much my confession, right there in the title bar. I'm a lousy cook. I'm lazy, I don't like to wash dishes, I don't like to sweat, and there's nothing good on the television in the kitchen because we don't have a cable box in there. So... I pretty much hate to cook.

As a service to all of you ladies and gents out there like me who hate cooking, I've decided to begin this blog to share easy and good-tasting recipes that aren't a huge pain in the nether regions to prepare. It's not gourmet, it's not going to shame your mother-in-law, but you can finally stop surviving on Ramen and Hot Pockets.

Welcome to Food That Tastes Good.

~~The Lousy Cook